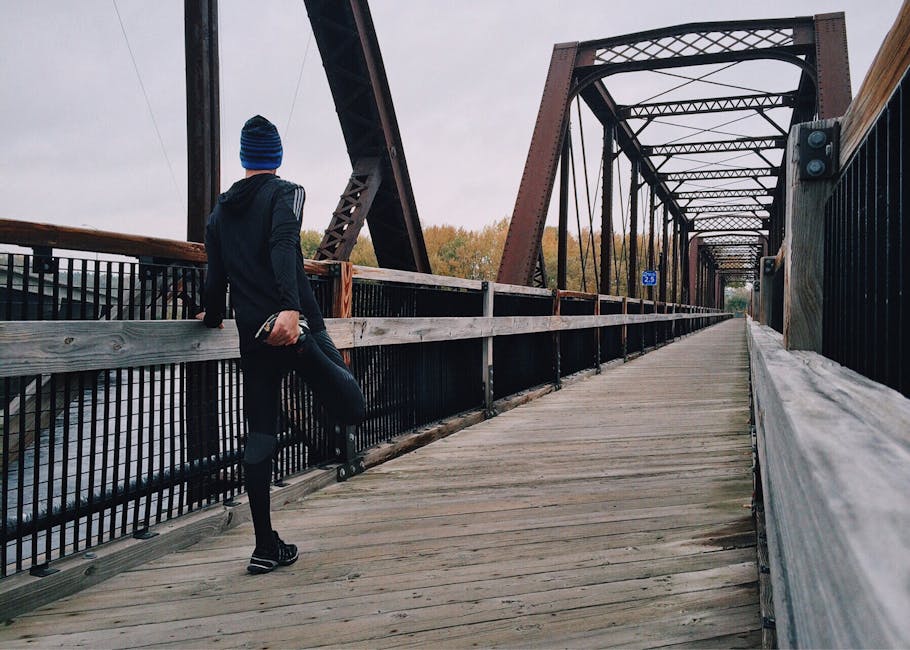
I know. Layovers aren’t the most exciting thing in the world. But who said layovers can’t be fun? In this guide, I show you how to rock a layover in Singapore, including information about visas, where to stay, where to eat and an example of a 12-hour itinerary for Singapore.
In this post:
Why don’t you start off by watching this short video of how I experienced my layover in Singapore last summer?
Disclaimer: this post may contain affiliate links. If you make a purchase through one of these links, I’ll receive a small commission, at no extra cost to you. Thanks for supporting Ars Currendi!
Question: Do I need a visa for a stopover in Singapore?
You probably don’t. Most nationalities do not require a visa to enter Singapore. If you’re from the United States, the United Kingdom, Canada, Australia or most European countries, you can enter Singapore without a visa.
If you’re not from any of the aforementioned countries, it’s a good idea to check the government’s website to see if you need a visa to get into Singapore.
Question: Can I leave Changi Airport during transit?
Again, if you’re from one of the countries mentioned above, you can leave the airport without a visa.
If you’re from a visa-requiring country, you should apply for a visa to leave Singapore Airport during transit before flying to Singapore. Check with your embassy if you’re not sure how to do this.
Now that we’ve got the visa information out of the way, let’s take a look at some basic travel facts about Singapore.
Singapore is an island city-state located just south of Malaysia. It’s one of the smallest, but most densely populated countries in the world and it’s mostly known as a global hub for education, finance and entertainment.
It really all depends on how much time you have, as with any layover.
Singapore is one of the best countries for a layover, because the city is not too big, everything is easily accessible through public transport and there are a lot of things to do in a relatively small area.
And even if you have a lot of time, you might want to take it easy after a long-haul flight.
But still, there are quite a few things to do in Singapore when you’re short on time. Here are a few of my personal favourites if you are leaving the airport. (More detailed information in the Singapore itinerary below)
The airport of Singapore has consistently been named one of the top airports in the world. It consists of three interconnected terminals (T1, T2 and T3) and one separate terminal (T4).
Here are some things to do during a layover in Singapore airport:
If you follow this itinerary, you’ll be able to see all Singapore highlights in just 12 hours.
You could even do it more quickly, if you’re a fast traveller. Or if you’re travelling alone.
There are many things you can do in Singapore in one day. Here’s a useful overview of what you could fit into your one-day layover to get the most out of your stay.
Breakfast is the most important meal on a day. Even when you’re on a layover in a foreign country.
Here are some options for breakfast in Singapore.
For this suggested Singapore layover itinerary, you’ll be exploring some of the city’s neighbourhoods in the morning. On the menu: Little India and Chinatown.
What I would recommend is that you simply walk around these neighbourhoods, get lost in the narrow streets and take in the atmosphere.
I suggest you start your morning in Little India.

If you don’t want to stroll around without a goal, check out some things to do in Little India.
Next, move to Chinatown using Singapore’s very efficient train system, the MRT.
You could buy a Singapore Tourist Pass, but since you’re only here for a short layover, it’s cheaper to just buy tickets for single trips. You can buy tickets at any upgraded General Ticketing Machine at MRT stations.
Again, if you don’t feel like aimlessly wandering around Chinatown, check out these things to do in Chinatown.
Although Singapore is literally the most expensive city on earth, you can still get lunch on a budget.
Below are some options for lunch in Singapore:
With a belly full of delicious food, it’s time to continue exploring Singapore.
Next up are cultural heritage, nature, and some bad ass light shows. Let’s go!
From wherever you had lunch, make your way to Katong, a residential neighbourhood where you’ll find remnants of Peranakan heritage – like the houses below.

Stroll along vibrant shophouses, narrow backstreets and small boutique shops.
There are also plenty of cafés, coffeeshops, bars and ethnic restaurants in this area. Take your pick if you’re in need of a small break.
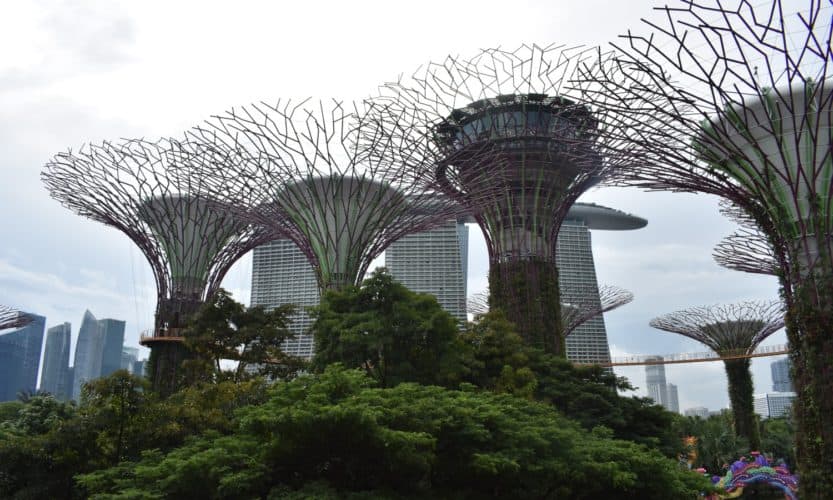
Next, we’re going to Gardens By The Bay.
If you’ve ever seen any pictures of Singapore, chances are you’ve seen the Supertree Grove, which is located in Gardens By The Bay. Don’t worry, we’ll get to that.

We’ll start off our visit to Gardens By The Bay by checking out the Cloud Forest observatory. This is an indoor tropical plant garden with a 30-metre waterfall as cherry on top.
You can spend as long as you like in the Cloud Forest. It’s definitely interesting enough to keep you busy for a few hours, but you could leave after 30 minutes, too.

Moving on: the Flower Dome. This is the world’s largest glass greenhouse and it could be described as a magnificent botanical garden. Same story here: you could stay here for hours, but you don’t have to.
The last thing you’re visiting before dinner is the Supertree Grove. Admission to the Grove is free.

The supertrees are up to 50 metres (which is equivalent to 16 storeys) high.
If you want to, you can walk on the skyway that runs through the supertrees at 22 metres high. Admission for this skyway is $8 for adults.
Don’t spend too much time here – you’ll come back after dinner to experience the supertrees at night.
Singapore is well-known throughout the world for its top class cuisine. What follows is a list of great restaurants in Singapore for an affordable price.
On many holidays, the day is over after you’ve had dinner. Not here.
You’ve still got two amazing light shows ahead of you. Oh, and did I mention they’re both free?
Here are the two shows you’ll want to attend:
The Garden Rhapsody show runs daily at 7:45 pm and 8:45 pm and it lasts for 15 minutes.

The Spectra show runs daily at 8 pm and 9 pm and it also lasts for 15 minutes.
I saw Garden Rhapsody (7:45 pm) first and then made my way to Marina Bay Sands for Spectra (9 pm). You could do it the other way around if you wanted to.

If your Singapore layover lasts for longer than just a few hours, you might just need a place to stay.
Here are some options for stopover accommodation in Singapore.
Hostels in Singapore
Airbnb in Singapore
As in all major cities around the world, there are many Airbnb listings in Singapore for people looking for the ‘home’ feel.
Bonus: sign up for Airbnb through this link and get up to $40 of travel credit off your first booking!
Couchsurfing in Singapore
And if you’re on a really tight budget, why not sleep for free – and make new friends in the process?
Use websites like Couchsurfing to stay with a local for free and have them show you around town.
There you have it. My 12-hour Singapore layover guide. Is there anything I missed? Let me know in a comment down below.
Thanks for reading!
-S
PIN IT!


Breathtaking nature, orange wine and bustling cities. What else could you be looking for in your next travel destination? Well, Slovenia has it all. These are my top Slovenia travel tips that will guide you through the holiday of your dreams.
Nobody needs to be convinced that Europe is a popular travel destination. In fact, travel and tourism directly contributed about 14 million jobs to the European economy in 2017.
Read more: My favourite solo travel destinations in Europe
And while that’s great news for Europe, it might make you feel like there are too many tourists. Especially if you’re visiting popular European hotspots like Paris and Rome.
Luckily, you won’t have that problem in some of the more undiscovered European countries – like Slovenia. This country will give you great attractions without the famous European crowds. Think about this:
Slovenia will give you all of the above, but without thousands of people doing the same thing – and for a fraction of the price. And in this article, I’ll tell you all about why I fell in love with Slovenia.
(Click on the links below to go to the relevant section of this blog post!)
On this map, you can find every place that is mentioned in this blog post.
Slovenia travel tips are no use to you if you can’t even get to Slovenia. So here’s a short section on how to get to this hidden gem.
Even though there’s only one airport in the entire country (near its capital Ljubljana), Slovenia is easily accessible by plane from all over Europe. Two low-cost carriers fly to Ljubljana:
Other than that, various ‘regular’ airline carriers fly to Ljubljana, but that will probably cost you a bit more. You may want to consider flying to nearby airports (like Trieste in Italy or Zagreb in Croatia) and taking public transport from there to Ljubljana.
If you don’t mind your trip taking a bit longer or if you want to travel in a more environmentally friendly way, there are various direct trains from Germany, Austria, Italy and Switzerland, among others. This is a great overview of trains to and from Ljubljana by The Man in Seat 61.
Now, this is the part you’ve been waiting for. The actual Slovenia travel tips. So let’s get this show on the road.

As the heading of this section suggests, this will be an overview of places of interest in Slovenia. In other words: whether or not Slovenia is worth a visit. (Spoiler alert: yes, it is.)
I’m not claiming to know the ins and outs of Slovenia, so if you visited recently and know of any place I don’t mention, please let me know in a comment. I’ll be happy to update this post, because I essentially strive to give my audience the most relevant travel tips possible.

The Slovenian capital is mostly known for its reputation as one of the greenest cities of Europe. Whether you’re strolling down its narrow streets or its wide avenues, you’ll feel like you are living in a fairytale.
Some things you can’t miss in Ljubljana: take a stroll along the river Ljubljanica, admire Prešeren Square (Prešernov Trg) and its pink baroque church, walk along the Dragon Bridge and, last but not least, take the cable car up to Ljubljana Castle.

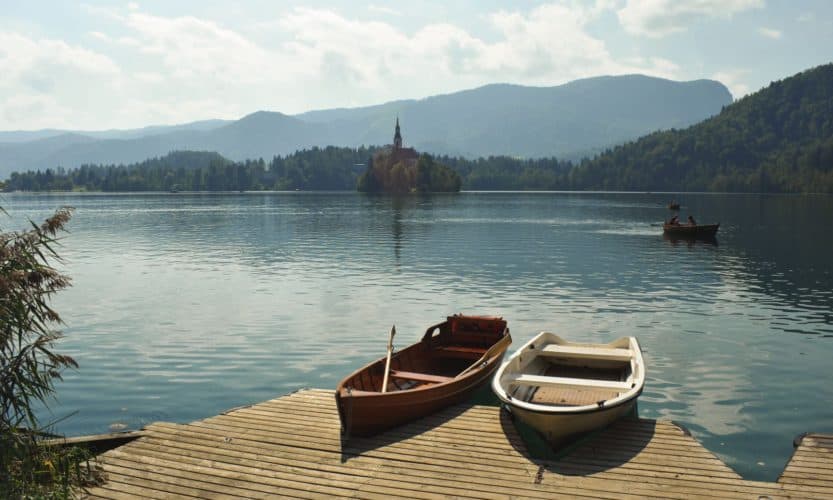
Bled is a small city in the north of Slovenia, mostly known for its lake, with a small island and church in the middle and a castle overlooking the lake from a nearby cliff.
Don’t forget to check out the lake from various viewpoints, hike up to the castle and admire the view, visit the island on the lake and take a trip in a traditional Pletna boat.

About 4 km (2,5 miles) to the north-west of Bled, you’ll find Vintgar Gorge: a gorge-ous ravine along the Radovna river. Vintgar Gorge is a perfect day trip from Bled as it will only take you about half an hour to get there.
In Vintgar Gorge, you’ll see wooden walkways guiding you through the ravine and spectacular natural scenery, and you’ll hear the sounds of birds singing and the water of the river running through the valley.

Lake Bohinj is the second Slovenian lake near Triglav National Park (with Lake Bled being the first). I personally like Lake Bled more than Lake Bohinj, but be sure to judge for yourself.
And although many people might prefer Lake Bled, one aspect of Lake Bohinj alone guarantees a mention in this list: its tranquility. Lake Bohinj is a lot less crowded than Lake Bled is, and it’s often seen to be more authentic and less aimed towards tourists.
With a surface area of over 880 square km (340 square miles), Triglav National Park (often abbreviated to TNP) is one of Europe’s biggest and most admired nature reserves. This park has something for everyone, all year round.
Points of interest include Mount Triglav (which every Slovene is expected to climb at least once in his/her life), Vršič Pass and Pokljuka Plateau.
Now, I’ve given you some pointers as to where to go, but you still don’t really know what to do in Slovenia. And that’s where this four-day travel itinerary comes in.
This is what to do during four laid-back days in Slovenia. (Based on my own trip to Slovenia with one of my best friends this summer)
Our flight to Slovenia arrived in the late afternoon. After arriving at the airport, we took a taxi to our hostel, dumped our bags in our room and went out on the town for dinner.
On your first night, you’ll want to grab dinner at Pop’s Place, a trendy burger bar in Ljubljana’s vibrant city centre. This was for sure one of the best burgers I’ve ever eaten, and they have a large collection of local craft beers as well.
After dinner, check out what Prešeren Square and the Triple Bridge look like at night on the way back to your accommodation.
Related: How to find cheap accommodation as a solo traveller
The first thing you’ll want to do on this morning is to get breakfast at Bazilika Bistro, a small café that serves breakfast and lunch – with loads of vegetarian and vegan options as well.
While you’re on your way to Bazilika, check out the Ursuline Church of the Holy Trinity. In case you’re too hungry to go inside the church, don’t worry. You’re not missing out on a whole lot. The church’s front facade and the adjacent city square are just as impressive, if not more so.
After munching on some banana bread, oatmeal or pie at Bazilika, make your way to Tivoli Park. Admire the flower garden, breathe in the clean green air and rediscover your child-like sense of wonder at the playground. Because shame and regrets are overrated.

Walk back to the city centre (Prešeren Square, Triple Bridge, Ljubljanica) and see what it’s all about during the daytime. Walk along the river Ljubljanica on a street called Cankarjevo nabrežje and find a restaurant for lunch.
Now that you’ve regained the energy you need for an afternoon of exploring, it’s time to discover the old town. Head to Gornji Trg, a beautiful square that’s a lot less crowded than Prešeren Square, but just as interesting.
Get lost in the small cobbled streets around Gornji Trg and find out what Ljubljana is actually like.
Next up on the travel itinerary: Ljubljana Castle (or Ljubljana Grad, as the locals call it). First, take the funicular to go up the hill, or hike it if you’re up for a challenge. Then, admire the view, learn about the history of Ljubljana and enjoy the atmosphere.
Come back down the hill, take a break and have a drink. Because you deserve it.
By now, it’s time to get back to your hostel, Airbnb, hotel, or wherever else you’re sleeping. Freshen up, maybe take a shower or put on some new clothes.
After that, find a restaurant for dinner on your last night in Ljubljana. We opted for TaBar, a tapas restaurant close to Pop’s Place. I strongly recommend you have a glass of orange wine here – or anywhere else, for that matter. And yes, I said orange. While that might sound strange, you’re going to have to trust me on this.

So this is the day you’re leaving Ljubljana for your two day trip to Bled.
So get up, find some breakfast — at your hostel, at a supermarket, at Bazilika — and get ready for the day that’s coming.
Get to the main bus station in Ljubljana (LJUBLJANA AVTOBUSNA POSTAJA), either on foot or by public transport – depending on your accommodation’s location. There are a few different companies offering a coach or bus from Ljubljana to Bled.
You can either buy your bus tickets online or buy them at the counter inside the bus station. The clerk should know just enough English to understand you’re trying to get to Bled.
I recommend you to take the bus in the early afternoon. The bus between Ljubljana and Bled will take just over one hour, which leaves you with plenty of time to locate your accommodation in Bled. (For example, we stayed in this gorgeous Airbnb!)
Related: get a $35 discount for Airbnb by signing up here!
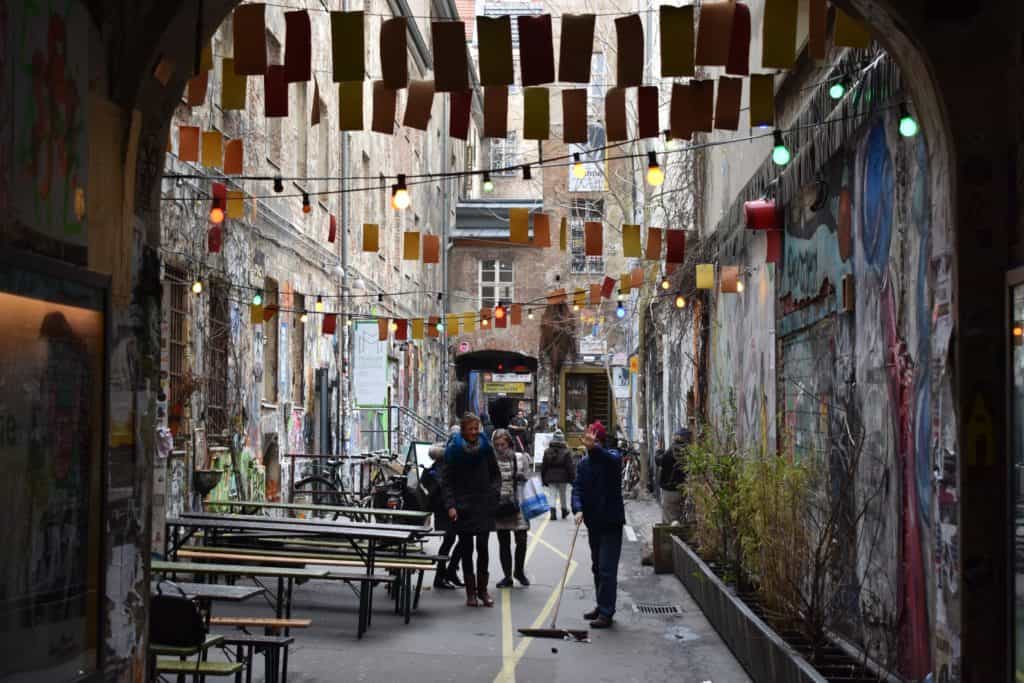
In case you still need to kill some time before your bus gets there, check out Metelkova, a former military headquarters that has been turned into a social and cultural centre.
Grab a quick bite in or around the bus station and board your bus. Just over an hour later, you should arrive at one of Bled’s bus stops, depending on which company you used to get from Ljubljana to Bled.
Once you’ve settled in your accommodation, dropped off your bags and freshened up, it’s time to head to the supermarket and pick up some snacks and drinks.
As for the rest of the day, you can fill it in as you please. This is your free afternoon and night, if you will. We hung around our Airbnb, made dinner and hit the hay early for once, so that we’d be well rested for day four.
This was the day I was most looking forward to. And you’ll soon find out why that is.
You should be set for breakfast, since you went to the supermarket on day 3 and presumably bought some granola, bread or other breakfast food.

Your next destination is Vintgar Gorge. Now, I can hear you thinking: “How do I get from Bled to Vintgar Gorge?” Well, there are a few options:
If you feel like you need some energy before you enter the park, there’s a small restaurant at the entrance where you can get some food or drinks.
Once you’ve gotten to Vintgar Gorge, pay the €5 entry fee (cash only!) and feast your eyes on the gorgeous — excuse the pun — scenery around you.

For your way back from Vintgar Gorge to Bled, you have the same options as before. If you’re feeling too tired to walk, you might want to call a cab – like we did.
By now, it’s lunchtime. Find a restaurant in Bled and feast.
The following Bled activities can be experienced in any order you want, so I’ll just give you the information you need and you’ll have to decide when you want to do what.
After getting the most out of your visit to Bled, head back to your Airbnb, hostel or apartment and cook dinner for the last time before you head back home.
Now, if you really need to ask me if Slovenia is worth a visit after reading all of this, I don’t think this last bit is going to convince you.
But yes, you should definitely visit this European hidden gem. This list of Slovenia travel tips should get you well on your way to plan the ultimate adventure there.
Disclaimer: I am aware of the fact that Slovenia is more than Ljubljana and Bled. But so far, I have only visited these places, so I don’t feel comfortable giving you advice on any other destinations in Slovenia.
Thanks for reading!
-S
PIN IT!


With over 3.5 million inhabitants, Berlin is one of the biggest cities in Europe. Besides heavy traffic and a very well-thought-out public transport system, that means that there is a lot to do here. The reasons why you should visit Berlin will quickly become clear if you keep reading. This is my three-day, off-the-beaten-path Berlin itinerary for solo travellers.
Note: this post will be something between ‘what I did in Berlin’ and ‘what you should do in Berlin’. That being said, if I recommend a hostel, a restaurant, a café or an activity, it’s because I enjoyed it there. But it’s also because that’s what I did. Feel free to use this Berlin itinerary as a starting point and make your own travel itinerary according to your wants and needs.
I was in Berlin in February 2019, from Monday until Friday. However, I didn’t really get to do any things worth mentioning on Monday or on Friday because of my flight times. For that reason, I’m only including three full days in this itinerary.
This 3-day Berlin itinerary will give you a good idea of what to do in Berlin and what you can expect on a trip to the German capital.
Visiting Berlin off-the-beaten-path doesn’t mean that you can’t visit popular tourist attractions. It just means that you don’t want to spend your entire trip looking at them.
If you’re like me, you’re not fundamentally against popular attractions. You don’t stay away from the Eiffel Tower in Paris or Dam Square in Amsterdam just because many people visit them. After all, there’s a reason why tourist attractions are so popular.
So, since these attractions are still appealing, even when thousands of people lay eyes upon them every day, we’re going to cram the most important sights of Berlin into one day.
Day 1: Morning
After settling into Berlin, you’re going to check out a guided tour of Berlin during the wars of the 20th century.
Day 1: Afternoon
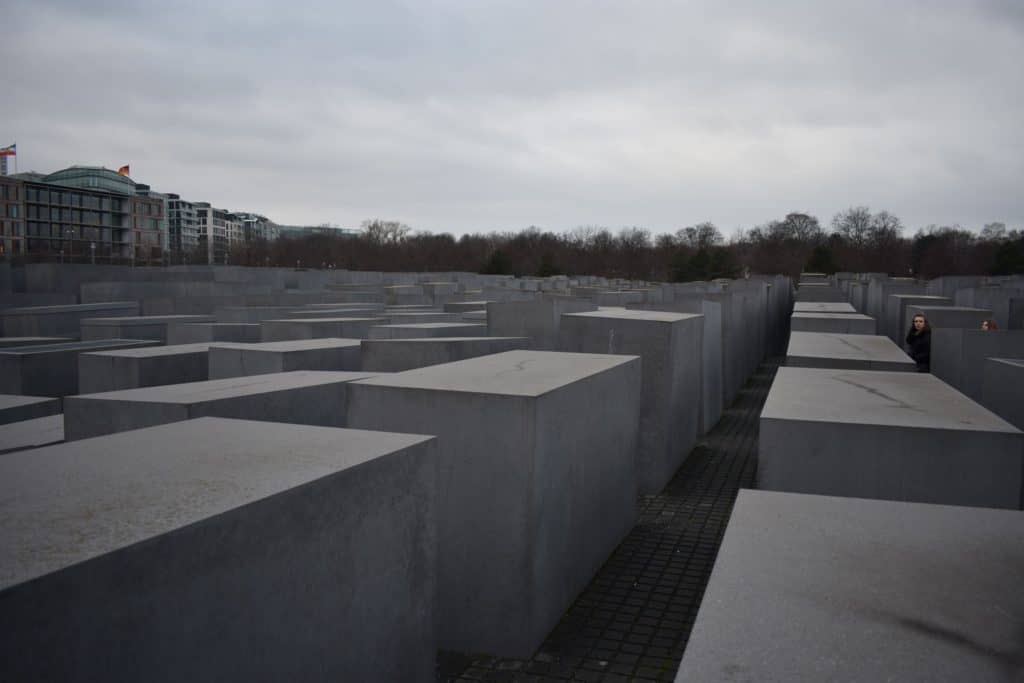
Now it’s time for the bare Berlin essentials. DDR Museum, Bebelplatz, Gendarmenmarkt, Memorial to the Murdered Jews of Europe, Brandenburger Tor and Reichstag Building. It’s going to be a busy afternoon.
Note: I didn’t include Checkpoint Charlie in this day (or anywhere else in this Berlin itinerary) because I personally believe it’s not worth a visit. It’s become too much of a tourist trap recently and it’s supposedly really underwhelming.

I told you to get up early, right? You’ll see why that is if you just keep reading. But let me tell you: it’ll be worth it.
Day 2: Morning
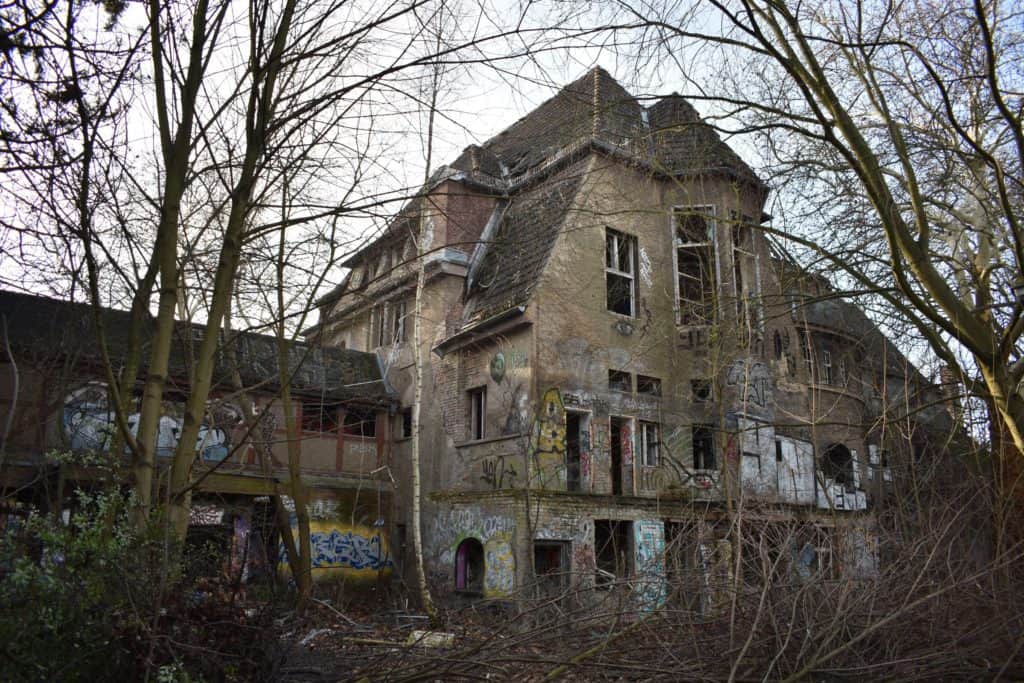
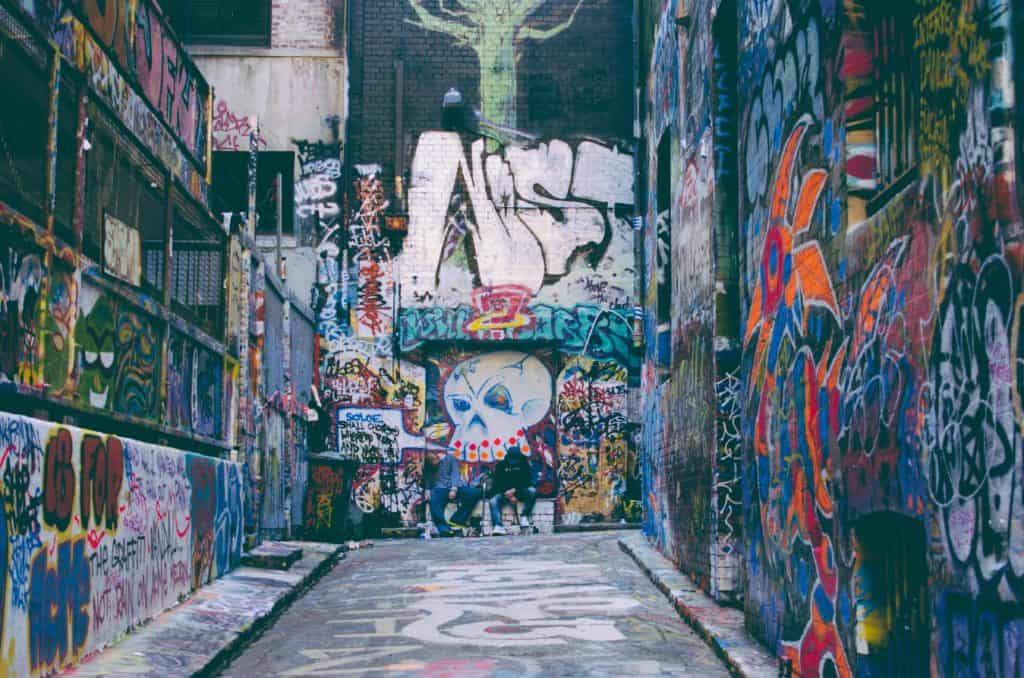
This morning, your main project is to visit the abandoned children’s hospital Kinderkrankenhaus Weißensee. You might think “But why would I want to visit a place like that?” and the answer is simple. Street art.
Related: Why I decided to visit an abandoned children’s hospital

Day 2: Afternoon
The next things you should be looking forward to are a free alternative walking tour, guided by locals, and an exhibition about the human body.

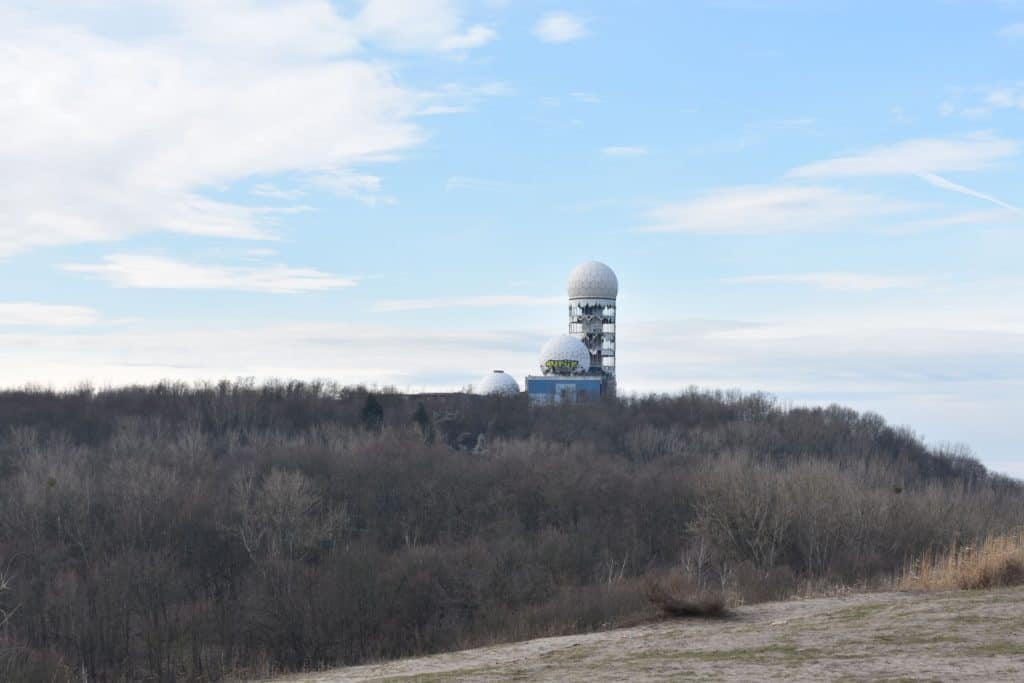
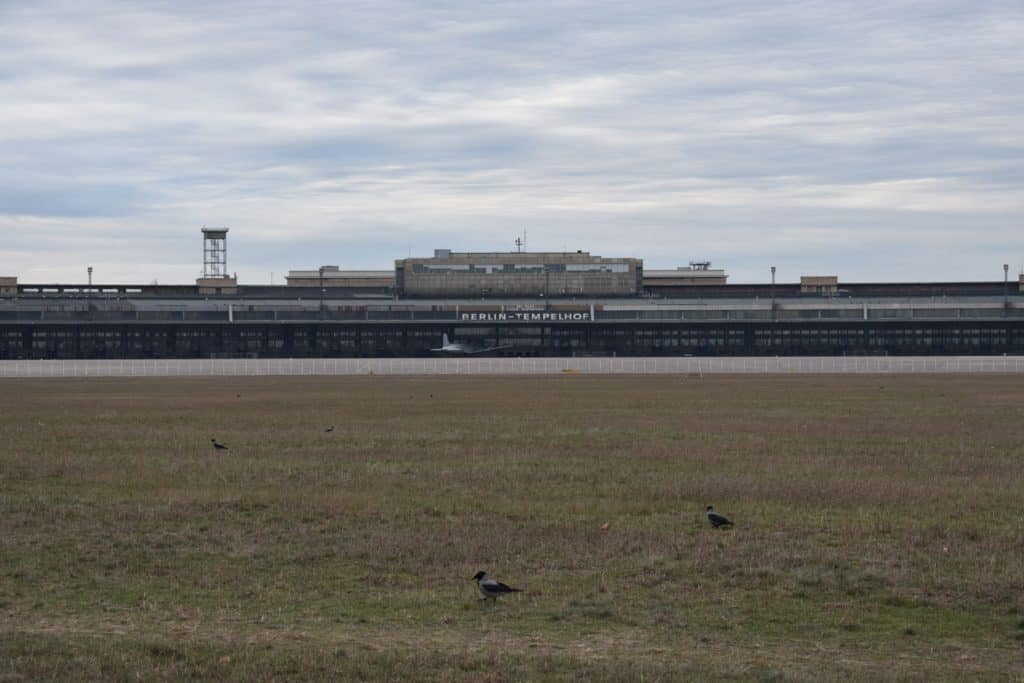
The last day of this Berlin itinerary will have you exploring some famous abandoned sites in Berlin, as well as checking out an iconic remainder of the Cold War and an indoor street food market.
Day 3: Morning

Day 3: Afternoon

This is the end of my 3-day solo Berlin itinerary. Hopefully, it’s given you some ideas for things to do in Berlin ‘off the beaten track’, because the German capital is more than just Checkpoint Charlie and Brandenburger Tor.
However, a Berlin itinerary is not the only thing I’m giving you in this post. Although you could stop reading right now if you wanted to. I won’t be offended – and I’d likely never find out anyway.
How expensive is a city trip to Berlin? How long should I save up for this trip?
Luckily for you, I kept track of literally all my expenses while I was in Berlin. So, this is not only a Berlin itinerary, but it also gives you an answer to the question “Is Berlin expensive?”
Honestly, it is quite expensive, but Berlin prices tend to be very similar to any other major western European city.
Note: I used an app called Tripcoin to keep track of my expenses. My flight to Berlin touched down at 2:30 pm on Monday and my flight back home departed in Berlin at 11:05 am.
This is everything I spent that had anything to do with my trip to Berlin.
I know this might sound like a lot, but for a 5-day solo city trip to a big city in western Europe, I’d say it could have been a lot worse.
If you want to splurge on a nice hotel and a fancy restaurant, be my guest. If you want to spend as little money as possible, be my guest. The point of travelling solo is that you can do whatever the hell you want to, so I’m not going to sit here and tell you how much money you should spend in Berlin.
I’m just giving you this information so that you can decide for yourself.
There — now you know why Berlin has become one of my favourite cities to spend time alone in Europe.
Have you ever been to Berlin? What did you think of it?
If you haven’t gone to Berlin, would you consider going there? Why (not)?
Thanks for reading!
-S
PIN IT!


The first stop of our big Japan trip this summer was Osaka. With its population of nearly 2.8 million people and its reputation as one of the biggest foodie cities in Japan, it’s no surprise that it’s such a popular tourist destination. This is how we spent five days in and around Osaka.
Disclaimer: if you’re going to Osaka and you’re looking for a five-day itinerary, you might not be able to fully follow this one. It includes three day trips and some events that aren’t freely accessible to everyone. It should, however, get you a pretty good idea of the main things you need to do.
Click one of the links below if you’re only interested in a specific part of this itinerary!
Day 2: Dotonbori (Osaka) & Bon Odori Festival
Day 4: Hiroshima & Miyajima day trip
You can also check out the map below for every specific location mentioned in this blog post.
Our flight from Brussels Airport departed at 10 am. We had one short layover in Frankfurt, where we arrived at 11:15 am. After another flight – my first ever long-haul flight, by the way – we arrived in Osaka at 8 am.
Before you ask: yes, I felt jet-lagged, but it wasn’t nearly as bad as I had expected.
After my dad picked up the mobile WiFi device he had ordered beforehand, we boarded a bus that took us to one of the main bus stations of Osaka. From there, we had a short (but exhausting) walk ahead of us.
I assure you, I’d rather walk for an hour in decent conditions than do that fifteen-minute walk again. Just saying.
We eventually made it to our Airbnb around 1 pm, but we weren’t officially allowed inside until 3. Luckily, a lady was cleaning the apartment and let us in to drop our bags before we set out to explore the city.
New to Airbnb? Get $35/€30 off your first booking through this link!
One of the first things we saw (mainly because it was right around the corner from where we were staying) was an indoor shopping arcade called Tenjinbashi-suji. Of course, we had no idea what it was called at the time, but I found out afterwards.
This arcade featured quaint side streets, boutique shops, small cafés and pachinko and slot machine establishments.
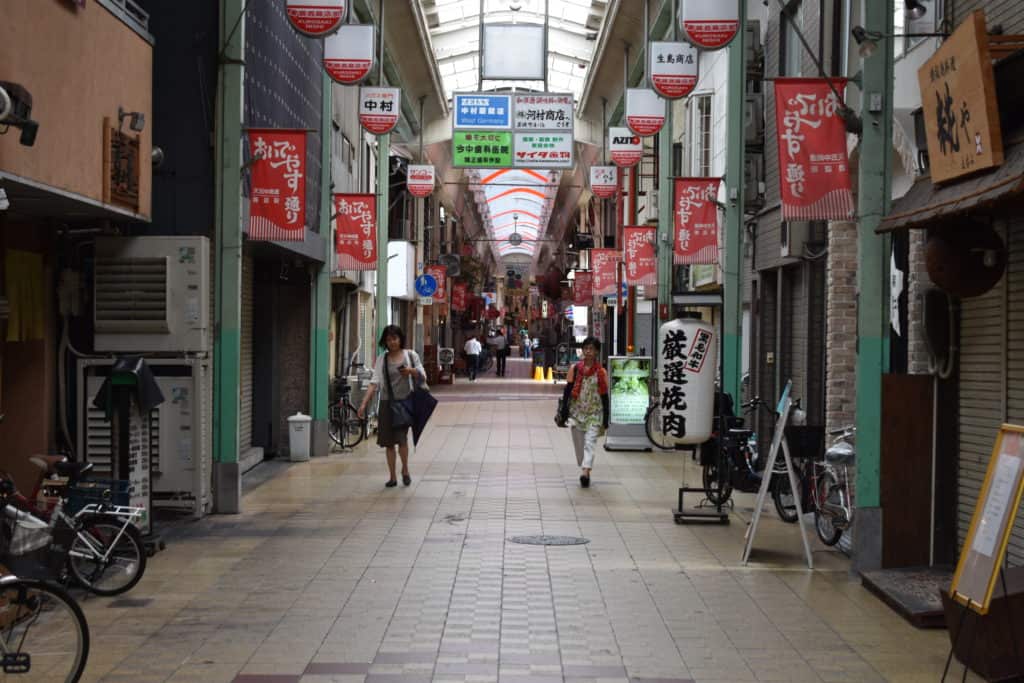
Fun fact about pachinko: it’s the Japanese response to western slot machines and a nifty way around the government’s ban on gambling for cash. Also, the pachinko market in Japan generates more gambling revenue than Las Vegas, Macau and Singapore combined. Madness.
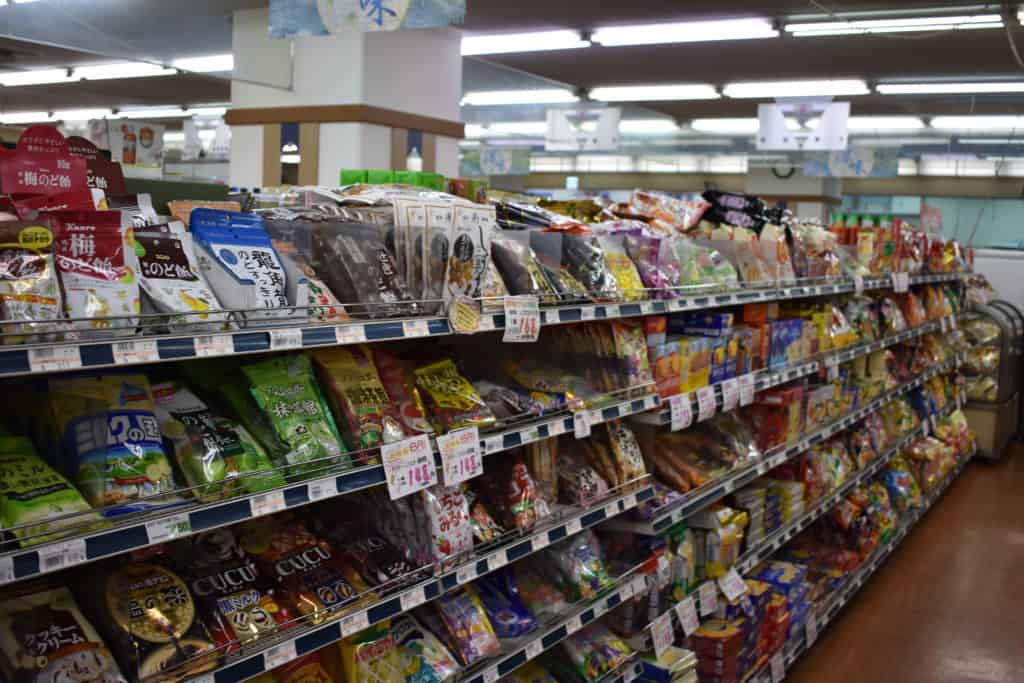
Anyway. Around 3 pm, we decided to try to find unique flavours of candy in a convenience store near our Airbnb. As in most convenience stores around the world, I assume, there was an entire section dedicated to candy and cookies. However, the exciting part in Osaka is that – assuming you don’t speak Japanese – you have nothing to go off except the illustrations on the packaging.
We picked up some candy and sweets and headed back to the Airbnb to dump our stuff and freshen up before heading back to the city.
After spending some time at the apartment to unwind, we went back to the city to explore some more. We found a business card at our Airbnb promoting a nearby coffee shop called Haiku Coffee, so we decided to go there.
I wasn’t able to find a website, but they do have a Facebook page and you can find their contact information by just Googling “Haiku Coffee Osaka” (or just click this link).
When we entered the coffee bar we saw that there was only one big table in the middle of the establishment and we were the only guests. The waiter was very kind and tried his very best to tell us some stories in English. The coffee was freshly made and tasted great.
Now that we got our coffee fix, we walked around some more and really took in the atmosphere of Osaka.
My parents then went back to the apartment and my sister and I set out to take some pictures to keep our Instagram followers happy. Afterwards, we went back to the apartment as well and then we all went out for dinner together.
Earlier, as we were walking through Tenjinbashi-suji, we had noticed a small restaurant on one of the corners. It looked very secretive and it was hidden away behind bamboo sliding doors.
The first time we walked past, the doors were open and there was a man (we would later find out he was one of the cooks) standing outside. My dad asked him if we could make a reservation for that night, and so we did.
Fast forward to 7 pm, when we had our first Japanese dinner experience.
As soon as we sat down at our table and got our menu, we realised that the chef didn’t speak any English. And neither did any of the waiters or other kitchen staff. On top of that, there are no pictures on the menu at all, so we have to resort to using Google Translate to let the chef know he can “surprise us” with anything. And he did.
The Japanese businessmen sitting at the bar, talking to the staff, were seemingly very amused at our struggle to order food.
We ended up getting an assortment of mostly raw fish, pickled vegetables and other foods that didn’t have the structure they were supposed to have. All in all, not a bad meal, but not the best.
One advantage of this experience is that I can now say I’ve had dinner in Japan where I mostly had no clue what I was eating. Two years ago, that would have been my worst nightmare. I’m definitely adding that to my mental ‘crazy travel experiences’ list.
On day two, we had our first experience with the Japanese public transport system called Japan Rail. It was a very welcome change to the public transport system in Belgium, where trains and buses often run late or they don’t even arrive at all.
In Japan, everything is very well organised. Trains mostly come on time, and if they are delayed, that information is spread efficiently and quickly.
Although our experience with this Japanese system was very pleasant, it was still quite confusing. In order to make it easier for you to take the train in Osaka, here’s a concise guide.

There are five categories of trains in Japan:
With the exception of the last category (Shinkansen trains), most JR lines offer all categories of trains. For example, if you’re going from Tokyo Station to Shinjuku Station, you can take a local train, a rapid train, an express train or a limited express train. This is one of the main reasons why you’ll probably never have to wait for a train for longer than ten minutes in Japan.
Information about Japanese trains is displayed both in Japanese and in English on information boards in the train stations, so you should have no problem locating your train.
As I covered in “Things You Should Know Before Visiting Japan“, I highly recommend that you get a JR Pass if you’re staying in Japan for seven days or more. You’ll probably be travelling around quite a bit, which means that train fares will definitely add up if you don’t have a JR Pass. It’s also important to know that you can’t buy a JR Pass in Japan, but you have to order it online before going to Japan.
We had breakfast in the train station.
I know, it doesn’t sound glamorous at all, but it was actually very tasty. We found a small food store – I don’t want to call it a bakery because they weren’t, you know, baking anything – in the station. Everything looked delicious and the smells reminded me of going to a bakery on Sunday morning and immediately smelling the fresh buns that just came out of the oven.
We bought some fresh croissants and a whole assortment of other buns. While we were deciding which buns were going to give us a sugar rush that morning, my dad had gone to Starbucks to pick up some coffee to go with our breakfast.

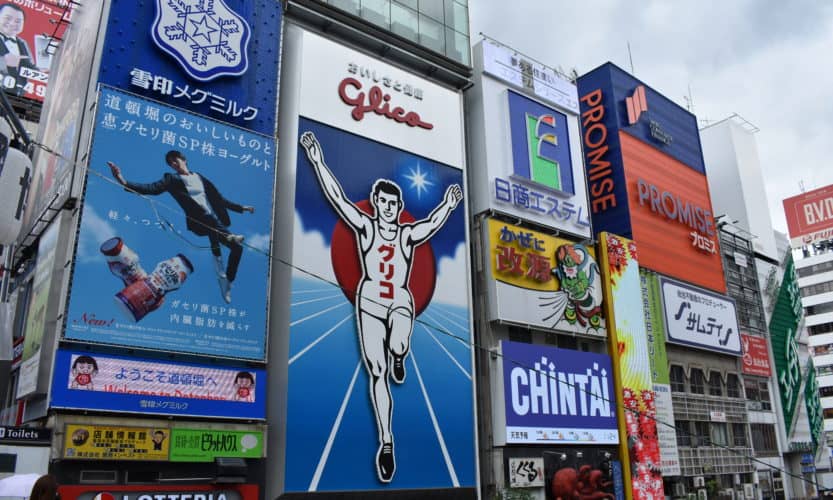
When I tell you that no Osaka itinerary would be complete without including Namba and Dotonbori, I’m not just exaggerating. You really do have to see the neon signs, the flocks of people and the flashing advertisement panels for yourself.
However, chances are that you have no idea what I’m talking about. In that case, allow me to introduce you to the pinnacle of modern Japanese culture.
Namba is one of the districts of Osaka’s Chūō ward, located very centrally within the city. Among locals, it’s known as one of the major entertainment districts of the city, as it’s home to many of Osaka’s most popular restaurants, bars, clubs and arcades.
Within Namba, the Dotonbori area is one of Japan’s major tourist attractions. So yes, there will be many tourists if you’re travelling during high season, but I strongly believe that it’s worth the visit and that the tourists even add to the experience.
You might have heard of the Glico Man. Well, you guessed it: you can find the Glico Man sign in Dotonbori. It’s the only sign in the area that hasn’t been changed since its original installation in 1935. The sign depicts an athlete on a blue track, who is meant to convince the world of the power of Glico candy.
")
After spending the morning in awe of the busy streets of Namba and Dotonbori, we decided it was about time to get lunch.
Looking back on it now, this meal was probably one of the most wholesome, most impromptu decisions we made during our two weeks in Japan.
As you’ll soon come to learn, all major cities in Japan are filled to the brim with department stores. Some of the biggest and most famous chains are Loft, Mitsukoshi, Daimaru and Hankyu. These department stores usually have a basement floor (sometimes even two entire floors) that is entirely dedicated to food. They’re like big indoor food courts that still remind you of outdoor food markets when you’re walking through them.

We went to one of the department stores in Osaka and we bought sushi, vegetable salads and raw meat. We took our bag, which was filled to the brim with delicious Japanese food, and we took the elevator up to the 14th floor, where we found a lunch garden rooftop terrace that was mostly empty.
And so, we sat down on the ground, opened up our boxes and we had lunch overlooking the Osaka skyline. Let me tell you: the food was great, the view was better and my company was the best.
Side note: I also got a kick-ass clip for my first Japan travel video! (The one right after the beat drops where my sister and I jump in the air, 1:47 in the video)
All stuffed up from lunch, we took the elevator back to the ground floor and returned to Namba. I filmed some footage for the travel video and we spent some time trying to find the perfect spot for the ‘Gram. After that, we returned to the Airbnb to freshen up before the big event of that day: the Bon Odori Festival.
Now, if you’re reading this blog post to get an idea of what you can do during your stay in Osaka, it’s very unlikely that you’ll be able to follow along for this part. My apologies for that.
At this point, I’m about 90% sure that you’re thinking “But Sander, what is a Bon Odori Festival?”. To explain that, we have to go back to the meaning of Bon (or Obon).
Obon is an annual Buddhist event to commemorate one’s ancestors and honour their spirits. A Bon Odori Festival, literally translated as “Bon Dance Festival”, is an event that is entirely based around Obon. There are food stands where you can hear yakitori sizzling on the fire, stalls where you smell the garlic from fresh gyoza and many other food and drink related stands.
If you ever get lucky enough to experience Bon Odori Festival for yourself, I highly recommend you locate a food truck that sells kakigori. This is essentially just shaved ice and coloured syrup in a cup, but it’s so much fun to eat and it actually tastes like something other than ice. The main reason I like kakigori so much is probably that it reminds me of the kakigori I ate at the company Bon Odori Festival back in Belgium when I was a kid.
Other than the whole food truck situation, there’s usually a big square stage in the middle of the festival grounds. On this stage, people are singing and dancing, and when the time comes for the Bon Odori, people form circles around the stage and start dancing themselves. If you can’t imagine anything that looks like this, I put a short fragment of it in the video.
My dad works at a Japanese company. He has travelled to Japan for work a lot over the past few years, and when we decided to go to Japan on holiday, he quickly found out that there would be a Bon Odori Festival organised by the company on our second day there.
Side note: companies aren’t usually the ones who organise these festivals. The company my dad works at does it every year and they make the new employees help in the organisation. Also, new employees are responsible for the entertainment, which means that they were dancing on the stage for the majority of the night. You can also see this in my travel video (and it’s one of my favourite shots in there!)

Once we realised that we were going to this festival, my dad arranged for us to get traditional Japanese clothing so that we wouldn’t stand out against all the Japanese people in our regular jeans and t-shirt. This festival was surreal to experience as a westerner and I’m very thankful to my dad for giving us this opportunity.
On day three, it’s about time for you to get out of the city and take a day trip to Nara. Again, no Osaka itinerary would be complete without mentioning the beautiful city of Nara, which was Japan’s first capital city back in the eighth century.
Music tip: listen to Arrival in Nara by alt-J while planning this day trip. It’s ridiculously good.
The main thing Nara is famous for is the deer which roam around freely through the crowds of awe-struck tourists. You might have heard that they walk around the city, but that’s not true. The deer mostly stay within Nara Park. Not to worry, though: this is still an enormous park and you won’t even be able to see all of it.

At the entrance of the park, you might feel like you’ve made a terrible mistake and you’ve fallen for a tourist trap. That’s to say, there are a LOT of tourists here. But many of them don’t bother to wander deeper into the park after visiting the main temple, so you’ll probably have more deer to yourself if you do just that.
When we were in Nara, we had a local guiding us. As my dad works at a Japanese company, like I mentioned earlier, he used to have a boss who was born in Nara. This man’s name was Mr Egawa and he left the company a few years ago, but he gladly agreed to guide us around his hometown.
The first place you should visit after getting over the initial realisation that you’re sharing the pathway with thousands of wild deer is Todai-ji Temple. This temple is one of Japan’s most famous temples and it has great historic significance.
")
The name might not ring a bell, but what if I told you that this temple is home to one of the biggest Buddha statues of Japan? And what if I told you that the temple is the biggest wooden building in Japan? You’d deem it worth a visit, right?
")
After gazing at the immense statue of Buddha and walking around the temple, cautious not to fall for any palm reading or fate prediction scams, you’re going to walk along the path for a little while until you get to Nigatsudo Hall.
So, you’ve seen the main attractions of Nara park and you want to get away from the tourists and still see some amazing things. I’ve got just what you need: Nigatsudo Hall.
This hall is located at a four-minute walk from Todaiji Temple (and it’s actually a part of the Todaiji Temple complex), so you’ll get there in no time. Many other travellers don’t take the time to visit this place, because they really only want to see the huge Buddha statue. While that’s fine, you wouldn’t be reading this post if that’s all you were interested in.
")
The pillars you can see in the picture above were constructed in honour and gratitude to people who made sizeable donations for the construction and upkeep of the temple complex. The smaller pillars were constructed for anyone who donated the equivalent of $1,000. Their big brothers can range anywhere from $1,000 to $100,000. Our Japanese friend told us that the symbols that are engraved in the stones are names of the families that donated.
")
Bonus: if you do decide to go to this part of the temple complex, you’ll be able to take kick-ass pictures like the one above.
I also highly recommend that you wander around Nigatsudo Hall for a while. There are small paved pathways that make you feel like you’ve travelled back in time to imperial Japan, where you’re exploring an abandoned city.
Now it’s time to make your way to the other side of the park. By now, you’ve probably reached the late afternoon and you’ll want to rest somewhere idyllic. Boy, do I have the perfect location for you.
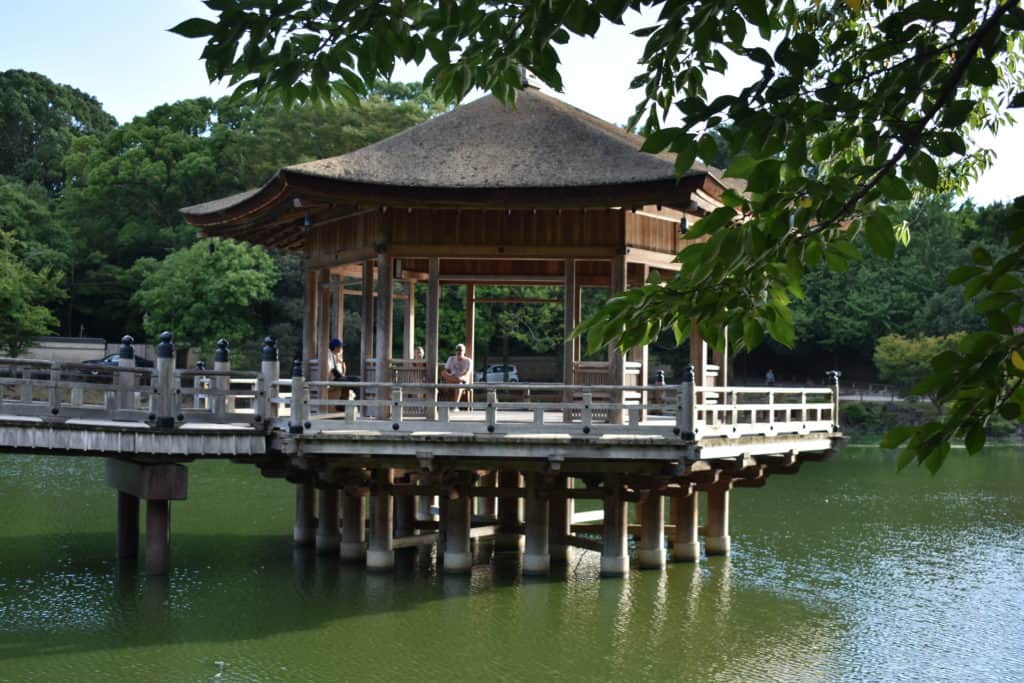
This little thing is called Ukimido Pavilion. It’s the perfect place to sit down for a while, catch a breath and listen to the sounds that nature produces. My sister and I also, you guessed it, walked around the pavilion in search of hidden Instagram spots. What do you know? We found them. I’ll let you discover them for yourself, though. Be sure to tag me on Instagram if you find them!
After discovering the fascinating hidden past of Japan, chilling with deer on a grass field and taking plenty of pictures, you’ll head back to the city of Nara for dinner.
We had a reservation at a restaurant just outside the city centre with Mr Egawa and his daughter Yuri. She spent a few years studying in Belgium (go figure!). As we were waiting for Yuri to arrive at the restaurant, we realised that it wouldn’t open until 6 pm. And that’s the story of how we ended up in a bar in Nara that used empty shopping carts as tables and empty barrels as chairs.
We all gulped down a refreshing drink and then made our way to the restaurant. The food was great, but I had the feeling that it was something like ‘Westernised Japanese food’. I’m not even sure whether or not that makes sense, but oh well.
After dinner, we really got to experience what it’s like to walk through Nara at night. Mr Egawa and Yuri took us to one of their favourite places in the city: a small lake that was located right in the city centre.
At that time of day, there were several lanterns that lighted up the area around the lake. People were unwinding and picnicking after a long day of working hard. The whole thing was kind of surreal: it was an extremely relaxing experience in a country that never seems to sleep.
Our fourth day in Osaka was another day trip. This time, we went to Itsukushima Shrine on Miyajima Island and Hiroshima. If you want to do the same, here’s how you should go about it.
First off, you’re going to want to take the Tokaido-Sanyo Shinkansen train from Shin-Osaka Station to Hiroshima Station. There you’ll transfer to the San-Yo JR Line bound for Miyajimaguchi Station.
Again, I can’t stress enough how much I recommend getting a JR Pass. Especially if you’re going to do as many day trips as we did. A JR Pass will significantly cut your transport expenses in Japan. For your reference, a return trip to Hiroshima would set you back about 20,000 yen (equivalent of about €170 / £150 / $190). A 14-day JR Pass that gives you unlimited trains and Shinkansen rides would cost 46,000 yen (€360 / £320 / $410).
Anyway. You’re in Miyajimaguchi Station now. From here, you can take the ferry to Miyajima Island, which is where you’ll find Itsukushima Shrine. This ferry is covered by your JR Pass, but be careful to go through the JR entrance when boarding the ferry.
Starting off with what is probably the main reason you’re interested in Miyajima: Itsukushima Shrine. The huge Torii gate that seemingly floats on the water at high tide. At low tide, it’s possible to walk all the way to the foot of the Torii gate and admire it from up close.
I know, it’s tough to schedule your visit based on the weather and the tides. But if you arrive at the island at low tide and you have some spare time in your itinerary, I suggest that you stay until the shrine is fully in the water.

After spending some time marvelling at Itsukushima Shrine, you should make your way back to the ferry. On the way back, you’ll have a choice between a path along the water and a path that seems to go through some kind of village. Take the village route.
It’s definitely catered toward tourists, but it’s where you’ll find some deliciously prepared oysters. According to my dad, anyway. A bit further along the path, you’ll also find several food trucks that sell all kinds of grilled seafood. We tried the grilled octopus and it was delicious, although slightly chewy.
Now, for the second part of this day trip. It’s time to go to Hiroshima. Get back to Miyajimaguchi Station and take the San-Yo JR Line back to Hiroshima Station.
For anyone who has any historical knowledge, Hiroshima won’t be another intelligible Japanese name. It will be the city where the first atomic bomb fell in 1945. In the aftermath of the bomb, nicknamed Little Boy, over 100,000 civilians died. That’s why every major tourist attraction in the city has something to do with remembering the lives that were lost in that attack.
The two memorials we visited were the Atomic Bomb Dome and the Peace Memorial Park.

The Atomic Bomb Dome is the building where the bomb actually fell. This was the only building around the bomb’s hypocentre that was still standing after the bomb hit the city. It was registered as UNESCO World Heritage in 1996 as a symbol for peace.
The Peace Memorial Park is the main park of Hiroshima and it’s home to the A-Bomb Dome and various other memorial sites, museums and monuments. Nowadays, it’s a nice park to take a stroll in.
After spending a gloomy afternoon in Hiroshima, it’s time to take the Shinkansen back to the upbeat city of Osaka. More specifically, we’re going back to Namba, to check out what it looks like by night.
 by night")
In our specific situation, my sister and my mom wanted to visit one of the clothing stores. My dad and I took that as an opportunity to bond over some cans of beer at the riverside. Three months later, that’s still one of my fondest memories of the whole trip.
When my sister and my mom came back from the store, we went to dinner. We opted for a small riverside restaurant that served tapas-like plates. It was a lot of fun and the food was delightful.
Yes, another day trip. Deal with it.
There are a few options that will take you from Osaka to Kyoto.
The fastest (and most expensive) option is the JR Shinkansen from Shin-Osaka Station to Kyoto Station. However, I don’t recommend this option if you don’t have a JR Pass. It’s only 9 minutes faster and it costs twice as much. If you do have a JR Pass, however, go right ahead.
The other option is to take the Kyoto JR Line from Osaka Station or Shin-Osaka Station to Kyoto Station. Preferably, you’ll want to take a Special Rapid train, which will only stop at Osaka, Shin-Osaka, Takatsuki and Kyoto.
The first thing you’ll probably want to visit is the infamous Arashiyama Bamboo Grove. You know, the forest with the tall bamboo trees. Starting from Kyoto Station, it takes one more train ride to get there. Take the San-In JR Line bound for Sonobe and get off at Saga-Arashiyama Station. From there, it’s only a short walk away.
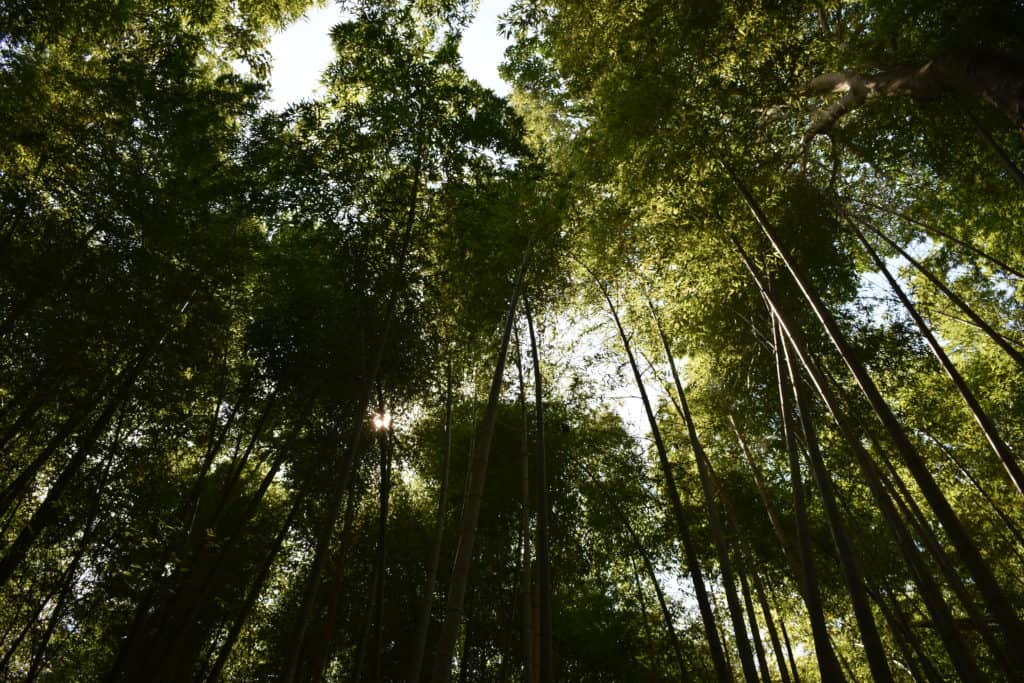
This forest is in a similar situation as Nara Park: it might seem like there are many tourists, but there are so many hidden corners (which are just as magnificent as the main pathway is) that you won’t have a problem finding them. Venturing off the beaten path has never been easier.
By the way, here’s a quick tip if you’re trying to get good pictures of yourself in the bamboo forest. Get the person who’s taking the picture to do it from a low perspective. That way, it’s much easier to make it seem like you’re the only person in the forest.
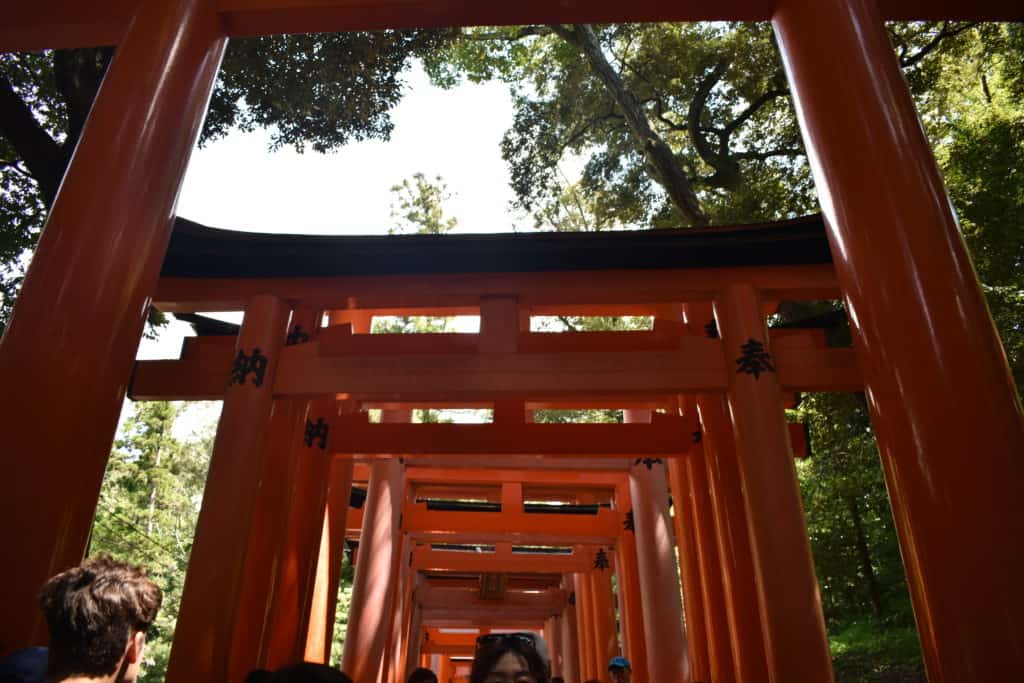
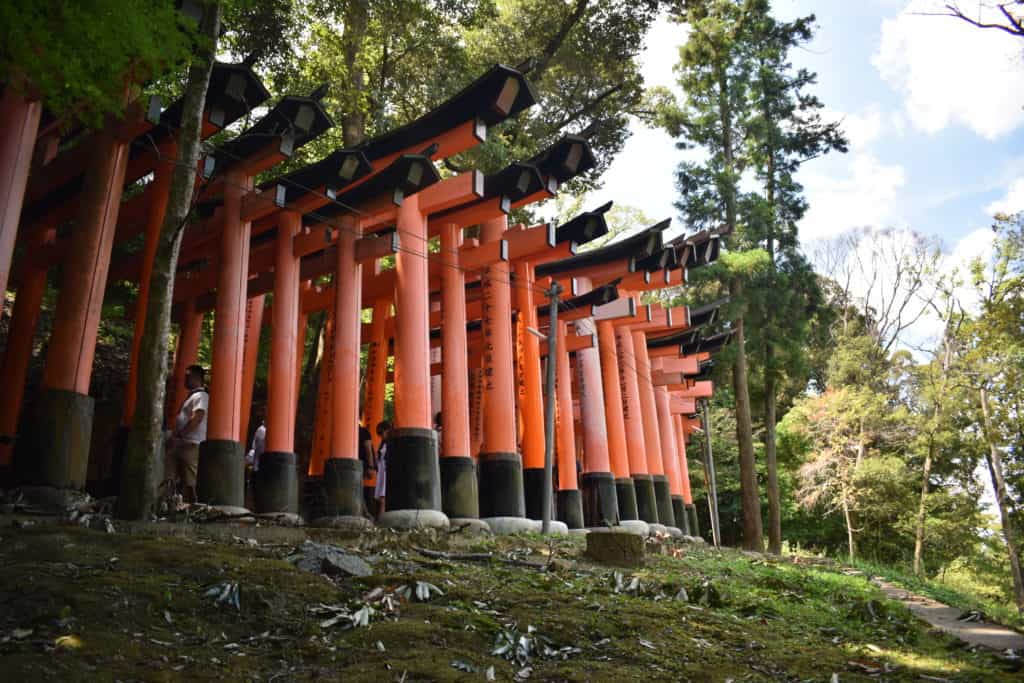
From Arashiyama Bamboo Grove, I recommend going to Fushimi Inari Shrine. This is one of the most famous and renowned monuments of Japan: a pathway through the mountain paved with thousands of red Torii gates.
The best way to get there is to take the San-In JR Line from Saga-Arashiyama Station to Kyoto Station. There, you should transfer to the Nara JR Line to Inari Station.
Again, there will be a lot of tourists here. And again, the further along the path you go, the fewer tourists will be there with you. On the trail toward the Fushimi Inari Shrine, there are smaller shrines on the way to the top. After each shrine you pass, you will notice that a significant number of people give up. Those people decide to turn back instead of pursuing the hike to the top.
As a consequence, I recommend going as high up the mountain as you can. The entire hike to the top and back takes between 2 and 3 hours, depending on your speed.
Admission to the shrine complex is free and the complex is always open.
After taking a train from Osaka to Kyoto and visiting the Arashiyama Bamboo Grove and the Fushimi Inari Shrine, your morning has probably come to an end.
Now it’s time to find a restaurant for lunch. I highly recommend trying out okonomiyaki – a savoury pancake filled with a variety of ingredients – at one of these restaurants.
When you’re all lunched up and ready to go, head on over to Gion. This is the traditional Geisha neighbourhood of Kyoto. Admittedly, I had expected more of this, so I wouldn’t blame you if you skipped this and replaced it with another activity. I also won’t be able to give you directions to Gion, because that entirely depends on where you went for lunch. Just look it up on Google Maps and you’ll be golden.
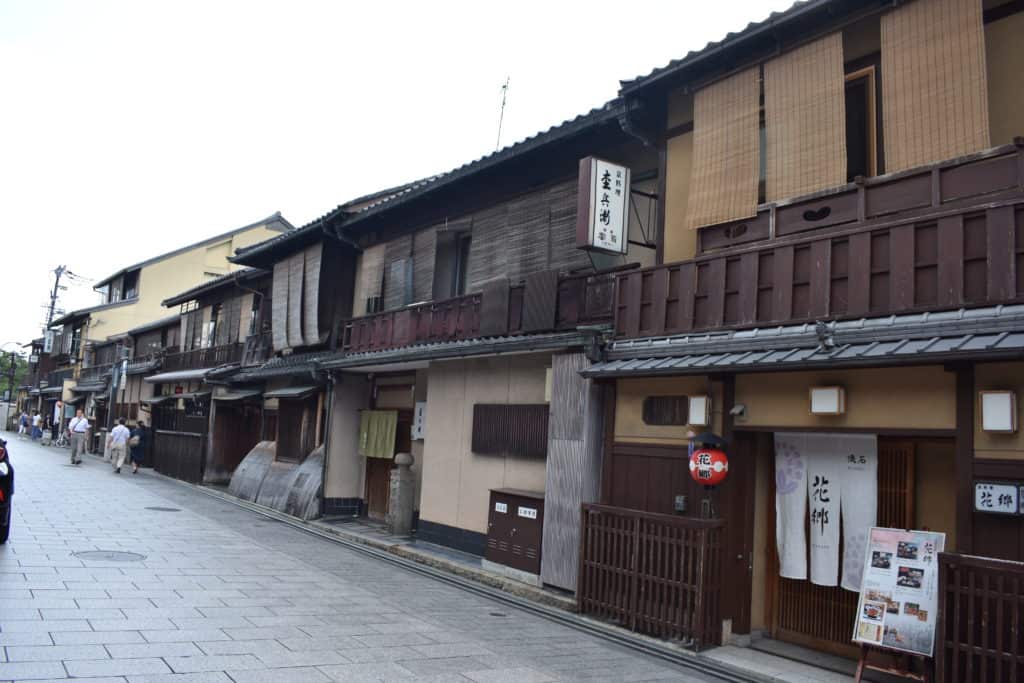
There’s a reason why I didn’t really enjoy Gion as much as I thought I would. It was very obviously aimed at foreign tourists. For example, if you see someone walking around in a yucata (traditional Japanese dress), there is no way to distinguish a genuine geisha from a tourist wearing a rental yucata.
If you are going to Gion, you might want to consider combining this visit with a leisurely stroll through Kyoto’s Higashiyama District. This district is one of Kyoto’s best preserved historic neighbourhoods.
By now, it’s about time to head back to Osaka, unwind a little and find a restaurant for dinner.
We had dinner with an Australian man named Michael who used to work with my dad. He now lives in Japan with his lovely Japanese wife and their two adorable daughters. It was very refreshing to have dinner with people who know the ins and outs of Japanese culture. Their stories about living and working in Japan fascinated me.
When this lovely get-together was over, we parted ways and my family and I headed back to the Airbnb for one last night in Osaka.
As a reader of this blog post, chances are that you’re confused. You might think something along the lines of “How dare you call this an Osaka itinerary? You were barely even there!” and I’d have no choice but to agree with you.
We didn’t spend a lot of time in Osaka. The reason is that my dad had told me that there wasn’t really that much to do there. If you feel cheated now, I sincerely apologise.
However, the point of this blog post was to inform you about our first five days in Japan.
That being said, I would love to come back to Osaka and explore the city itself, since, you know, we didn’t really do that.
In any case, I want to finish this blog post by saying this. You’re a true warrior if you got through the whole thing. I appreciate it a lot.
Thanks for reading!
-S
PIN IT!
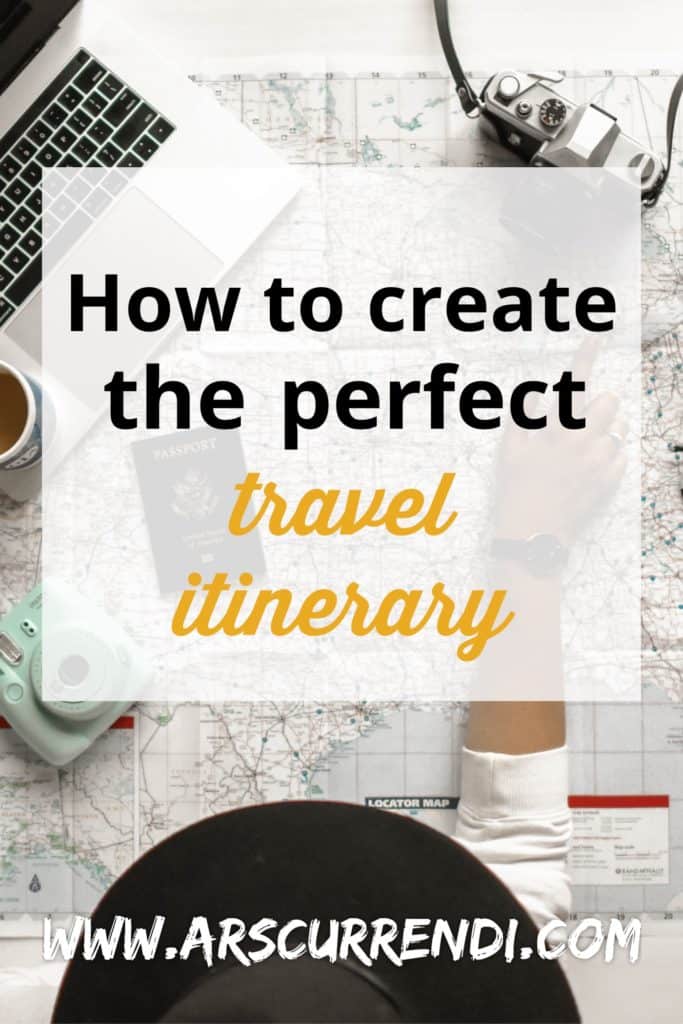
No, writing a fully fleshed out travel itinerary isn’t essential when you’re going abroad. But if you want to have control over the situation, it can help. A lot. And it doesn’t have to be as confusing as you might think. Here are 8 steps to help you create the perfect travel itinerary.
Latest update: 23 January 2022
If you only need to check one particular part of this tutorial or you only need to add a few things to your travel itinerary, click one of the links below to skip ahead to the part you’re looking for.
Planning your next journey and writing out a decent travel itinerary, when done thoroughly, is not something you can just bang out in an hour. If you really want to do this in-depth, you’ll have to get comfortable. So put on some good music, get a blanket and bring out the mint chocolate chip ice cream (Feel free to alternate these variables to your own liking).
Note: before you get on to the next step, it’s probably a good idea to decide who you’re going to be travelling with.
This is arguably the most important and influential step of your travel itinerary. Admittedly, you might already have a destination in mind for your next trip. If you do, feel free to skip ahead to step 3 (just click the link!). If you don’t, great! That’s what I’m here for.
Now, there are a lot of ways to figure out where you want to go next. Let me introduce you to some of them.
Yet another thing the Internet can help you with. Nowadays, there are so many people who tell the world about their travels, one way or another. You can find travel videos, blog posts, pictures and maybe even songs about their wanderlust. You can even find an entire travel itinerary for your trip online, without having to put in any work yourself!
My favourite thing to do is look at fellow travel bloggers’ websites and get inspired there. After all, if people like me enjoyed their time somewhere, why wouldn’t I?
Another Internet-related source for travel inspiration you could use is Instagram. Just like there are thousands upon thousands of travel bloggers, there’s a huge number of Instagram accounts dedicated to bringing you beautiful pictures of the world. (Of course, I have an account as well)

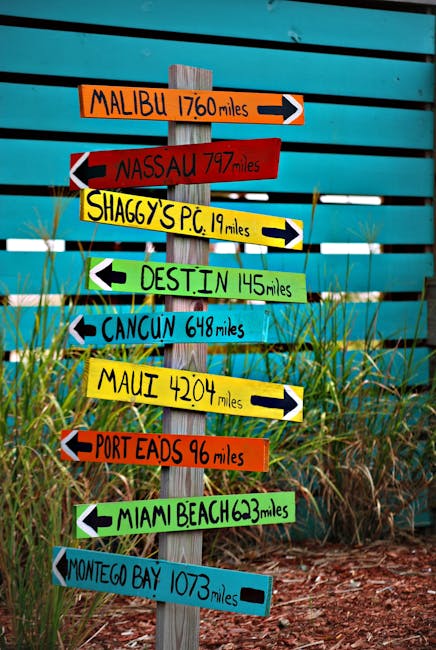
The classic destination decider. Throw a dart at a world map and travel to wherever it lands. Of course, if you do this often, your beautiful world map will be ruined by dart holes. Luckily, there are alternatives that don’t involve destroying your map.
For starters, if you have a globe lying around, you could spin it around and put your finger on it whenever and wherever. Then, you travel to the location under your finger. If it’s someplace you can’t travel to (ocean, restricted countries, North Pole), you spin again until you get a viable destination.
If you don’t have a globe, there are still alternatives out there. More specifically, there are websites that replicate the effect of a dart on a world map. You click the button and the dart gets fired. All without ruining a perfectly good world map! The main problem with these websites is that you get a dart firing into the ocean quite often, but that can be fixed quickly with another click on the button.
One of my favourites is Dart On Map.
If you have any adventurous friends, chances are they would be able to recommend some destinations to you. Even if you don’t have any people like that in your life, you could ask anyone else. After all, virtually everyone has a favourite place they’ve been.
For example, they might recommend you to go to Paris with your significant other. They might send you backpacking through South America. Or, if you’re lucky, they might even tell you to go on a city trip to Tokyo. There’s a whole range of places you might not even know of that opens up. I’d say it’s definitely worth a shot.
Cultural items can have a big impact on what we want to visit/see in life. For example, TV shows like How I Met Your Mother (2005-2014) and Friends (1994-2004) have always made me want to visit New York City to see if the big city life is really like that. Oldboy (2003) implored me to visit South Korea and see their beautiful culture and the way it differs from western society, while Cicade de Deus (2002) sparked my interest in Brazilian favelas.
If you’re feeling adventurous, why not let someone else decide where you’re going?
You don’t have to worry about any of the planning and you’re up for a nice surprise.
There are many websites and initiatives dedicated to this concept.
Okay. By now, you should have a good idea of the destination you want to go to. So let’s move on to the next step of your perfect travel schedule!
Read more: My favourite solo travel destinations in Europe
The spine of your journey planning will consist of basic information. As such, it only makes sense for this part to be the backbone of your travel itinerary.
What you want to do once you’ve found your location is look up hotels, restaurants, transport, … of said location.
Let’s assume you’re going to fly to your destination. After all, if you’re driving, you won’t need to plan it out as much; just type the destination in your gps system and off you go. If you need to catch a flight, though, a little more planning goes into it.
Please consider taking a bus or a train if you’re not going far away from home. It’s a lot better for the environment and it’s probably something different than what you’re used to. That being said, let’s move on, assuming you want to fly to your destination.
Looking up flights online is all the hype now, and if you know what you’re doing, you can get some great deals out of it. Here are some tips to help you find the cheapest flights possible:
Use multiple websites. Not all meta flight search engines display all airlines, so combine them to get the best possible results. My favourite flight websites include Google Flights, Skyscanner, Cheapflights, Kayak, Momondo, Skiplagged and Cheapflightsfinder.
Set up email alerts. If you’ve found a flight you like but the price is too high, set up an email alert. This way, you’ll get an email when the price for that flight changes and you might be able to do some great deals.
Turn on incognito mode (Control / ⌘ – Shift – N) and delete your browser cache to prevent the websites from using your past browsing behaviour to increase flight prices. (This is one of the most heated debate topics in the travel industry and many people don’t believe this helps. I, however, believe it doesn’t hurt to try)
Be flexible on your dates. The more flexible you are, the more chance you have of finding cheap airfare.
Once you’ve found the flight that is right for you, you can go ahead and book that. Make sure to have a hard copy of the flight reservation as well as a digital one. You never know what might go wrong. (Also, this hard copy is the start of your physical travel itinerary. Yay!)
Note: for some people, it might be a good idea to hire a rental car from the airport to get around more quickly. I don’t know a lot about that, though. I’m just putting it out there that this is something you may want to look into.
As a student, my travel budget is rather limited. This is why I prefer sleeping in hostels over hotels: they’re cheaper and most of them provide similar services of high quality.
My favourite hostel booking website is Hostelworld. Click the image below to go to their website.
Another advantage of hostels is that you can get to know other travelers from all over the world. Other cheap (or free) possibilities include Couchsurfing, overnight transportation, Airbnb (get €35 off your next trip by signing up through this link!), house sitting and sleeping in public places.
Related: How to find cheap accommodation as a solo traveller
I probably spend most of my time working on a travel itinerary looking for restaurants that look interesting.
However, this really depends on your personal taste. Food is something you can spend as much or as little money on as you’d like to. That being said, it’s entirely possible to survive on $25 a day. One of my favourite places to look for restaurants online is Tripadvisor. Everyone knows it, everyone has used it at some time, and everyone likes it. Therefore, I’m not going to explain how it works in this post – let’s just say that’s general knowledge.
If you want to find a restaurant where you can eat like the true locals, here are some tips.
The next step of making your travel itinerary will involve finding activities you want to do. These activites depends entirely on your personal preference and on the personalities of you and your travel buddies.
On the one hand, an advantage of travelling alone is that you get to choose everything you want to do. On the other hand, if you travel with other people, you might do things you never would have done otherwise.
The kind of activities you’re going to include in your travel itinerary depends mostly on what kind of trip you’ll be taking. If you’re camping in the wild, there’s no need to find a lot of projects to do on your vacation. By contrast, if you’re going on a city trip for three or four days, you will have to spend some time figuring out what you want to do.
That being said, there is no right or wrong choice. The point of traveling is doing exactly what you want to do and freeing yourself from the daily grind.
So if anyone recommends something to you but you don’t like it, you don’t have to do it.
There are always people who like to do sports when they’re abroad. If you’re not one of these, feel free to skip ahead to the next paragraph. If you are, though, allow me to introduce you to some kinds of sports you can do while on a holiday.
Once again, this is a category that pretty much applies to every kind of travel out there. Food is a great way to find out about your host culture and to try and live like a local. Here are some possibilities if you want to add food-related activities into your travel itinerary.
Related: How to find cheap food and drinks as a solo traveller
Admittedly, adventurous activities aren’t for everyone. Some people are born with the adventurous gene in them. These are the people who live for the adrenaline rush. Others, not so much. If you’re one of the adrenaline junkies, or if you want to try something that will scare you, keep reading.

Learning things is a great way to become richer without getting more wealthy. When you learn something, you get knowledge that you can use for the rest of your life. And isn’t that more valuable than anything money could buy?
For this one, I’m not going to make a list of things you can do, because it really all comes down to personal preference. You could take ceramics classes if that’s something that speaks to you, but if it doesn’t, great. This is where you get to be creative and do what you REALLY want to.
One of the main points of travelling is to get a glimpse into the lives of others. You want to know what the differences and similarities are between your home culture and the culture you’re visiting. If you’re only staying somewhere for a short time, however, it could prove difficult to see these things.
If you’re like me, incorporating culture into your travel itinerary is one of the most important things to keep in mind.
But let’s not forget culture in a more specific sense: architecture, music, art, history, customs. These are much easier to notice and look for. Here are some ideas.
By now, the hardest part of planning your travel itinerary is over. Congratulations! From here on out, it’s smooth sailing until the end and you can start looking forward to your next, perfectly scheduled, trip to wherever. I might even say you could stop after this step. But I suggest you don’t, because this is where the fun really starts.
Though you might be tempted to schedule your journey as closely as possible, I urge you to leave some space for imagination, emergencies and flashes of spontaneity. If you don’t do that, you’ll be stuck with your timetable and you’ll find yourself not enjoying your journey as much as you could (and should) be.
Situational sketch: you’re in a hostel on your first solo trip and you’ve made some new friends. One of them asks you if you want to explore the city with them tomorrow, but you already have plans. That sucks.
I made many mistakes when I went to Dublin, and one of the biggest ones was that I over-planned everything.
The point I’m trying to make is that you lose parts of your ability to be spontaneous if you plan too much. I agree that having some kind of security blanket, or something to fall back on, can feel reassuring. However, I’ve also never heard anyone say they regret doing something spontaneous as opposed to regretting NOT doing something.
This step applies mostly – if not only – to people who travel with friends, family, colleagues, … If you’re travelling by yourself (or if you’re creating your travel itinerary along with your travel companions), feel free to disregard this step and move on to the next one.
At this point, you might feel like your travel itinerary is pretty much perfect. It’s not. You’re not the only person who is going on this trip. If you’re like me and you enjoy planning everything out for everyone in advance, you should take some time to consider the feelings and needs of those people you’re traveling with.
Even your soul mate could want and expect very different things than what you’ve been crafting up. Make sure you consult them before finalising your plans and putting the final touches on your travel itinerary.
This step is also very important when you feel like you know your travel mates enough to make decisions for them. I’m not trying to jeopardize any relationships, but you don’t know enough. You really do need to keep them in mind and ask them if they’re okay with what you’ve come up with.

That’s right! Now that you know for sure where you’re going and which activities you’re going to be doing, it’s time to buy a map. Side note: this could also be a great opportunity to come together with anyone you might be traveling with. Get some coffee and food, take out a notebook and start discussing your trip and getting hyped!
A map can be an excellent way to visualize your trip. The kind of map you’re going to be using also depends on the kind of trip you’re going to be taking. If you’ll be road tripping through the USA, buying a map of the streets in New York City isn’t going to get you very far.
Getting right down to it: indicate your activities / stops / cities on the map. This will give you a better view of your schedule and it’ll make you realise whether or not your trip is actually doable. It can also help you find the best way to get from one place to the next.
Yes! If you got this far, be sure to give yourself and your friends a big high-five. This is the last step of your travel itinerary. In this step, you have to carefully and thoroughly go over everything one last time. Check if you:
Once you’ve checked everything on that list and fixed any potential problems, there’s really nothing more to do than pack your bags and wait until you can get going. I truly hope you’ll make the best of your travels, and you’ll enjoy it as much as I enjoyed writing this guide for you.
By now, you should have a pretty good idea of how to make the perfect travel schedule.
Thank you very much for taking the time to read this. I hope you’re happy with the way your travel itinerary turned out and I hope you found this guide somewhat useful. If you did, please be sure to share it with your friends and to follow us on Facebook, Twitter, YouTube and Instagram.
Are you someone who always plans too much or do you prefer to take things as they come without a fully fleshed-out travel itinerary?
Once again, thanks for reading!
-S
PIN IT!
Design by NXNW.